星期一, 2月 05, 2024

IBM i SSH


Video


Configuring the IBM i SSHD Server to Use Public-Key Authentication


Configuring the IBM i SSHD Server to Use Public-Key Authentication

HOW TO CONFIGURE AND USE SSH ON IBM i


HOW TO CONFIGURE AND USE SSH ON IBM i

Batch SFTP Download Example Using Password Authentication

 Batch SFTP Download Example Using Password Authentication

https://www.ibm.com/support/pages/batch-sftp-download-example-using-password-authentication

Troubleshooting


Problem

This technical document describes how to use password authentication with SFTP.

Resolving The Problem

Prerequisites

57XXSS1 Option 30 (Qshell)

57XXSS1 Option 33 (Portable Application Solutions Environment)

5733SC1 Options *BASE & 1 (IBM Portable Utilities for i)

Assumptions

  • A user profile to run the batch SFTP process exists on the LPAR.
  • A home directory in the IFS exists for the user profile that is running the batch SFTP process.
  • The home directory parameter in the batch SFTP user's profile contains the absolute path to its home directory.
  • The SFTP server's public host key is stored in the known_hosts file in the batch SFTP user's .ssh directory.
 

The primary components for a batch SFTP procedure that use password authentication is as follows:
 

  1. Password Shell Script
  2. Batch SFTP Shell Script
  3. CL Program
 
Caution: The following batch procedure example is provided on an unsupported, AS IS basis. The preferred method for batch mode transfers is public key authentication. The use of a private and public key pair for user-based authentication is more secure than a password. For batch connections that require password authentication, the procedure in this document describes how to submit a password to remote SFTP servers. The following example provided can be used as a guide to help implement password authentication with SFTP.
Step 1 - Create Shell Scripts

QSH CMD('/QOpenSys/usr/bin/touch /QOpenSys/etc/openssh_password_script.sh')

QSH CMD('/QOpenSys/usr/bin/touch /home/sftpuser/batch_sftp_script.sh')
 
Step 2 - Change Owner Of The Shell Scripts To The Batch SFTP User Profile

QSH CMD('/QOpenSys/usr/bin/chown sftpuser /QOpenSys/etc/openssh_password_script.sh')

QSH CMD('/QOpenSys/usr/bin/chown sftpuser /home/sftpuser/batch_sftp_script.sh')
 
Step 3 - Change IFS Authorities On The Shell Scripts

QSH CMD('/QOpenSys/usr/bin/chmod 755 /QOpenSys/etc/openssh_password_script.sh')

QSH CMD('/QOpenSys/usr/bin/chmod 755 /home/sftpuser/batch_sftp_script.sh')
 
Step 4 - Build Password Shell Script

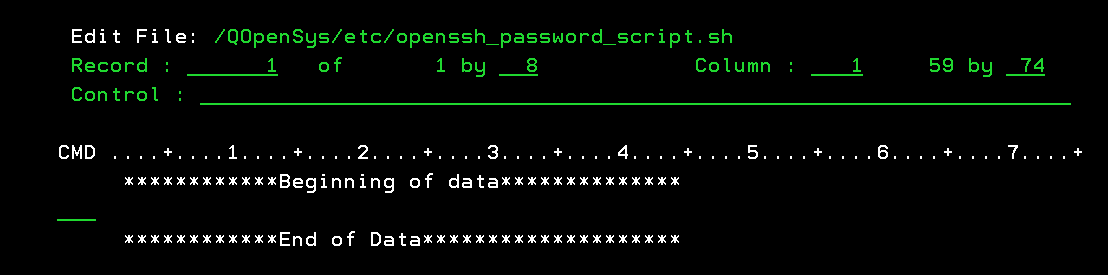
EDTF '/QOpenSys/etc/openssh_password_script.sh'


Press F15 to enter the Edit File Options Screen.

The password shell script must have UNIX-style line ends (LF) at the ends of lines rather than (CR/LF) like on Microsoft Windows-based machines.

Entering option 5 on the Selection line and then specify *LF for the Stream file EOL option to append a line-feed at the end of each line in the file.


Press the enter key for the EOL change to take effect.

Press F3 to exit the Edit File Options screen.

Store the password for the user account that the SFTP server administrator provided in the password script file.


Note: The prefix area in the CMD column is used for entering edit commands. For example, typing In can insert n blank lines after the record. Conversely, you can use Dn to delete the current line and the next n-1 lines or D to delete one line.

Here's a brief description of each record in the password script file:

#!/bin/sh -> Specifies the shell that interprets commands in the script file.

printf -> Prints the password for the user account that the SFTP server administrator provided to transfer files.

Press F3 to Save and Exit the password shell script.
 
Step 5 - Build SFTP Script To Download Files Programmatically


EDTF '/home/sftpuser/batch_sftp_script.sh'


Press F15 to enter the Edit File Options Screen.

The batch sftp shell script must have UNIX-style line ends (LF) at the ends of lines rather than (CR/LF) like on Microsoft Windows-based machines.

Entering option 5 on the Selection line and then specify *LF for the Stream file EOL option to append a line-feed at the end of each line in the file.


Press the enter key for the EOL change to take effect.

Press F3 to exit the Edit File Options screen.

The batch sftp script file is used to transfer files with a remote system programmatically.


Note1: The prefix area in the CMD column is used for entering edit commands. For example, typing In can insert n blank lines after the record. Conversely, you can use Dn to delete the current line and the next n-1 lines or D to delete one line.

Here's a brief description of each element in the batch sftp script file:

#!/bin/sh -> Specifies the shell that interprets commands in the script file.

export DISPLAY= SSH_ASKPASS=/QOpenSys/etc/openssh_password_script.sh -> Sets the $DISPLAY and $SSH_ASKPASS environment variables in the batch script file. The SSH_ASKPASS environment variable provides the location of the password shell script.

printf -> Prints the string of characters that are to be piped to the sftp command.

"get /home/milbank/vpncfg.txt\nquit\n" -> Downloads file "vpncfg.txt" to the batch SFTP user's home directory in the IFS.

serverUserID@server -> Specifies the user profile and remote SFTP server.

serverUserID -> The user profile that the SFTP server administrator provided to transfer files.

server -> The IP address, Hostname, or Fully Qualified Domain Name of the SFTP server.
Note2: On OS releases 7.5+, the SSH_ASKPASS_REQUIRE environment variable needs to be added to the export line.
Here's an example of the export line on 7.5+ systems:
image-20230713100705-1

Press F3 to Save and Exit the batch sftp shell script.
Step 6 - Sample Batch SFTP CL Program


The CL program invokes separate Qshell calls to execute the commands in the password & batch sftp script files.


Note: The IFS paths that include QOpenSys in the CL program example is case-sensitive.

Configuring the IBM i ssh, sftp, and scp clients to use public-key authentication

Configuring the IBM i ssh, sftp, and scp clients to use public-key authentication


Troubleshooting


Problem

This document provides the steps necessary to configure Public-key authentication on the IBM i OpenSSH clients to gain access to SSH servers.

Symptom


Cause


Environment


Diagnosing The Problem


Resolving The Problem

Public-key authentication allows the IBM i ssh, sftp, and scp clients to gain access to remote hosts without having to provide a password. The sftp and scp clients on the IBM i require Public-key authentication to gain access to ssh servers. Password authentication is not allowed with these two clients. The IBM i ssh client can use either Public-key authentication or Password authentication to gain access to ssh servers.

Prerequisites

5733SC1 IBM Portable Utilities for i5/OS *BASE & Option 1

57XXSS1 Option 33 (Portable Application Solutions Environment)

Assumptions

This document assumes the following:
  • The IBM i is running at V5R4 or higher of the operating system.
  • A user profile consisting of 8 characters or less to store the OpenSSH related objects needed to communicate with remote SSH servers.
  • The remote host is configured to accept and process inbound ssh connections.
Important Note: The user 'someuser' provided in the following examples is not the name of an actual IBM i profile. The commands that contain 'someuser' as part of the syntax should be replaced with the profile name that has been created to make outbound ssh connections.

Do the following to configure Public-key authentication on the IBM i:
1.Sign on a system that is running V5R4 or higher with the user profile designated for ssh-related functions.
2.On the operating system command line, run the CALL QP2TERM command to enter the PASE environment.
3.From within the PASE or Qshell environment, type the following commands:

Note: Licensed program product 57XXSS1 Option 30 (Qshell) is required to run the given commands in the Qshell environment.

a. Create a HOME directory on the IBM i to store the user's OpenSSH-related objects.
  • mkdir /home/someuser

b. Set permissions on the user's home directory.
  • chmod 755 /home/someuser


c. Create a rsa or ecdsa key pair that has no passphrase associated with it. Use the provided commands to create either a rsa or ecdsa key pair.

  • ssh-keygen -t rsa -N ""

  • ssh-keygen -t ecdsa -N ""

Note: During key generation, OpenSSH checks to see if there is a .ssh folder underneath the user's home directory. If one does not exist, the folder will be created in the user's home directory and the public/private key pair will be stored in it. The public key will have a .pub extension; for example, id_rsa.pub or id_ecdsa.pub.  The private key will be the one without the extension; for example, id_rsa or id_ecdsa.
Caution: The private keys generated by the ssh-keygen utility should be kept private.  It is very important to protect the private key from unauthorized individuals.  Anyone that can gain access to a user's private key has the potential to sign on to the SSH server where the corresponding public key has been copied.  Use IFS authorities to limit access to the private key to only the appropriate OpenSSH user.

d. Close the PASE or Qshell terminal session. Use the F3 key to exit the terminal session.
4.Change the home directory parameter in the user's profile to point to the IFS path of the home directory created in Step 3a.

CHGUSRPRF USRPRF(someuser) HOMEDIR('/home/someuser')
5.Sign off and sign back on up with the OpenSSH profile to allow the changes made to the HOMEDIR parameter to take effect. Note: Every time a user enters the PASE or Qshell environment, they will be placed into the IFS path specified in the HOMEDIR parameter in the user's profile.
6.
Send the public key that was generated in Step 3c to the SSH server administrator. The two most common methods for moving the public key to a PC are listed below:

a. Drill down to the IFS path /home/someuser/.ssh in IBM i Navigator, and right-click and select "Download" to save the file to your PC.

b. FTP the public key using binary mode into a folder on the PC.

Once the public key has been moved to the PC, you can send it to the SSH server administrator as an email attachment.

NOTE: Some SSH servers require the key to be in SecSH or Tectia format. (That is often the case if the SSH Server is running in Microsoft Windows)  If that is the case, and the SSH server administrator is unable to convert the key to the correct format themselves, you can follow technote https://www.ibm.com/support/pages/generating-openssh-public-key-and-converting-it-tectia-or-secsh-format, in particular from Step 5.
For example, to convert the id_rsa.pub key generated in step 3c to SecSH or Tectia format, you would run the following commands from within the users .ssh directory containing the keypair and then send the converted public key
ssh-keygen -e -f id_rsa.pub > id_rsa_win.pub
chmod 644 id_rsa_win.pub
7.Once the SSH server administrator has placed the public key into the appropriate location on the remote side, you can test the connection to see if Public-key authentication works.

a. On the operating system command line, run the CALL QP2TERM command to enter the PASE environment.

b. From within the PASE environment, execute the follow command:
  • ssh -T serveruid@somehost

Note: Replace serveruid with the name of the user profile that the SSH server administrator provided you with to gain access to the remote host. Replace somehost with either the IP address or host name of the remote system that you want to establish a connection with.

If this is the first time you have connected to the remote host using SSH, you will receive a message similar to the one below:
 
The authenticity of host 'somehost (x.x.x.x)' can't be established.      
ECDSA key fingerprint is SHA256:xxxxxxxxxxxxxxxxxxxxxxxxxxxxxxxxx.
Are you sure you want to continue connecting (yes/no/[fingerprint])?       
 
Type yes and press the Enter key to add the server's public host key into the known_hosts file in the .ssh folder in the user's home directory. If Public-key authentication is successful, you will not be prompted for a password.

If the remote host provides shell access, use the hostname command to verify that you are truly logged in to the SSH server. The hostname command will return the name of the system on which you are actually logged in to.

c. Close the SSH connection:

Type exit and press the Enter key to disconnect the SSH connection.
8.Once Public-key authentication has been successfully configured, the sftp and scp clients can be used to transfer files securely between the IBM i and the remote SSH server.  Listed below is the syntax that can be used to initiate sftp connections to remote systems:

sftp serveruid@somehost

Note: Replace serveruid with the name of the user profile that the SSH server administrator provided you with to gain access to the remote host. Replace somehost with either the IP address or host name of the remote system that you want to establish a connection with.


Historical Number

538212497

Product Synonym

OpenSSH
5733SC1